How to test internet speeds from linux

Speedtest-cli is a small command line application meant for testing your internet speeds via Terminal in various Linux distributions including CentOS, Fedora, Ubuntu and Mint. Speedtest-cli uses the speedtest.net website for testing your internet bandwidth.

Log into your servers Terminal and execute the following:

# wget https://gist.githubusercontent.com/anonymous/c910abe9388c0e8afbdc/raw/2beeb35575d3a0fbe53f310db880a695dacfee43/speedtest_cli.py
# chmod +x speedtest_cli.py
# ./speedtest_cli.py

how-to-test-internet-speeds-from-linux-01

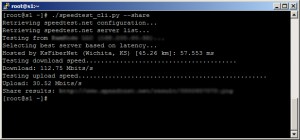
Here is what your speeds image will look like:

how-to-test-internet-speeds-from-linux-02

eBay USPS tracking number work around

When shipping through US Postal Service and selling on eBay you will notice after typing the shipping number and entering USPS under carrier, you are presented with the following error:

The tracking number(s) you entered appears to be a USPS Insurance label and/or USPS Signature Confirmation™ number. These services don’t automatically provide tracking information.

Tracking must be purchased separately. Please be sure you have purchased tracking associated with this number before submitting it.

It appears that this is an error in eBay’s system and they are aware of it. However there is no time frame or if this will ever be fixed. There is however a work around. Instead of typing USPS type the following under carrier:

US Postal Service

Doing the above it will accept the tracking number and the system will then start tracking. Listed bellow is a example of what it should look like:

ebay-usps-tracking-number-work-around

How to setup email forwarding for MailGun

When using MailGun you will want to setup an email forwarding known as “routing” which will allow any incoming email to @yourdomain.com to be forwarded to an existing email such as Gmail, Yahoo, Outlook etc.

Log into your MailGun account and click on the “Routes” tab. Now click on the “Create Route” button which you will now enter the following:

Priority:

1

Routes are evaluated in the order of priority from the lowest value to the highest value.

Filter Expression:

match_recipient("[email protected]")

This is what will match any emails that are sent to the above email which will trigger the fowarding to the bellow email.

If you want to use catchall replace the above with:

match_recipient(".*@yourdomain.com")

Actions:

forward("[email protected]")

This is where the email will be forwarded to. You can replace with any email at an external host such as Gmail.

Description:

Forwarding me my email

While you can type anything you want that will help you identify what this action does. I named mine the above.

Now you’re all set. You can add as many as you wish to have different users sent to different emails.

How to Install Skype 4.3 on various Linux Distros

As most of you know Microsoft released a new updated Skype version for Linux that brings a new user interface and improvements for the Skype client. There is now support for cloud-based Group Chat, file transfer support when multiple devices at once got enhanced, support for PulseAudio 3.0/PulseAudio 4.0, accessibility for blind and visually impaired users have been improved. Since it’s not yet been added to the Canonical Partner repository, we will have to download the deb package from the official Skype website and install it by hand.

Let’s first remove any previous versions of Skype you currently have installed.

# sudo apt-get remove skype skype-bin:i386 skype:i386
# sudo apt-get install sni-qt:i386

Now follow the install instructions on which version of Linux you are using and note the 32bit and 64bit versions.

Ubuntu 14.04, Linux Mint 17, Pinguy OS 14.04, Elementary OS 0.3 and LXLE 14.04:

32bit:

# sudo apt-get install gdebi
# wget download.skype.com/linux/skype-ubuntu-precise_4.3.0.37-1_i386.deb
# sudo gdebi skype-ubuntu-precise_4.3.0.37-1_i386.deb

64bit:

In order to install Skype 4.3 we have to add the i386 architecture and update the local repository index, so that we get all the 32 bit libraries required by skype, download the deb package and install it with gdebi:

# sudo dpkg --add-architecture i386
# sudo apt-get update
# sudo apt-get install gdebi
# wget download.skype.com/linux/skype-ubuntu-precise_4.3.0.37-1_i386.deb
# sudo gdebi skype-ubuntu-precise_4.3.0.37-1_i386.deb

Optional: Due to the fact that Skype is an application created for 32 bit systems, on 64 bit versions of Ubuntu it may use the Clearlooks theme by default, instead of Ambiance, which is the default Ubuntu theme for Skype. To fix this, you have to install the Murrine and Pixmap GTK2 engines, like this:

# sudo apt-get install gtk2-engines-murrine:i386
# sudo apt-get install gtk2-engines-pixbuf:i386

Ubuntu 13.10, Ubuntu 12.04, Linux Mint 16, Linux Mint 13, Pinguy OS 12.04 and Elementary OS 0.2 Luna:

32bit:

# sudo apt-get install gdebi
# wget download.skype.com/linux/skype-ubuntu-precise_4.3.0.37-1_i386.deb
# sudo gdebi skype-ubuntu-precise_4.3.0.37-1_i386.deb

64bit:

# sudo apt-get install ia32-libs
# sudo apt-get install gdebi
# wget download.skype.com/linux/skype-ubuntu-precise_4.3.0.37-1_i386.deb
# sudo gdebi skype-ubuntu-precise_4.3.0.37-1_i386.deb

If your Skype client crashes you can try running one of two methods that have been reported to have fixed the issue.

# rm -rf ~/.Skype

or

# sudo apt-get sqlite3
# sqlite3 ~/.Skype/$USER/main.db
> SELECT body_xml from Messages WHERE type=68 AND body_xml LIKE '%files%' LIMIT 0,10;
> UPDATE Messages SET body_xml=substr(body_xml,instr(body_xml,' UPDATE Messages SET body_xml=substr(body_xml,instr(body_xml,' .quit
How to fix unfished transactions remaining in Centos 6

If you have ever been greeted with the unfinished transactions remaining in Centos while trying to update yum, then follow these simple steps.

There are unfinished transactions remaining. You might consider running yum-complete-transaction first to finish them. The program yum-complete-transaction is found in the yum-utils package.

Login to your server via SSH and enter the following command:

# yum install yum-utils

Now enter the following:

# yum-complete-transaction

Note: You will have to repeat this command a few times until everything is completed.

If you want to remove yum-utils, enter the following:

# yum remove yum-utils